Photographing Sunset Silhouettes: A Simple Beginner's Checklist
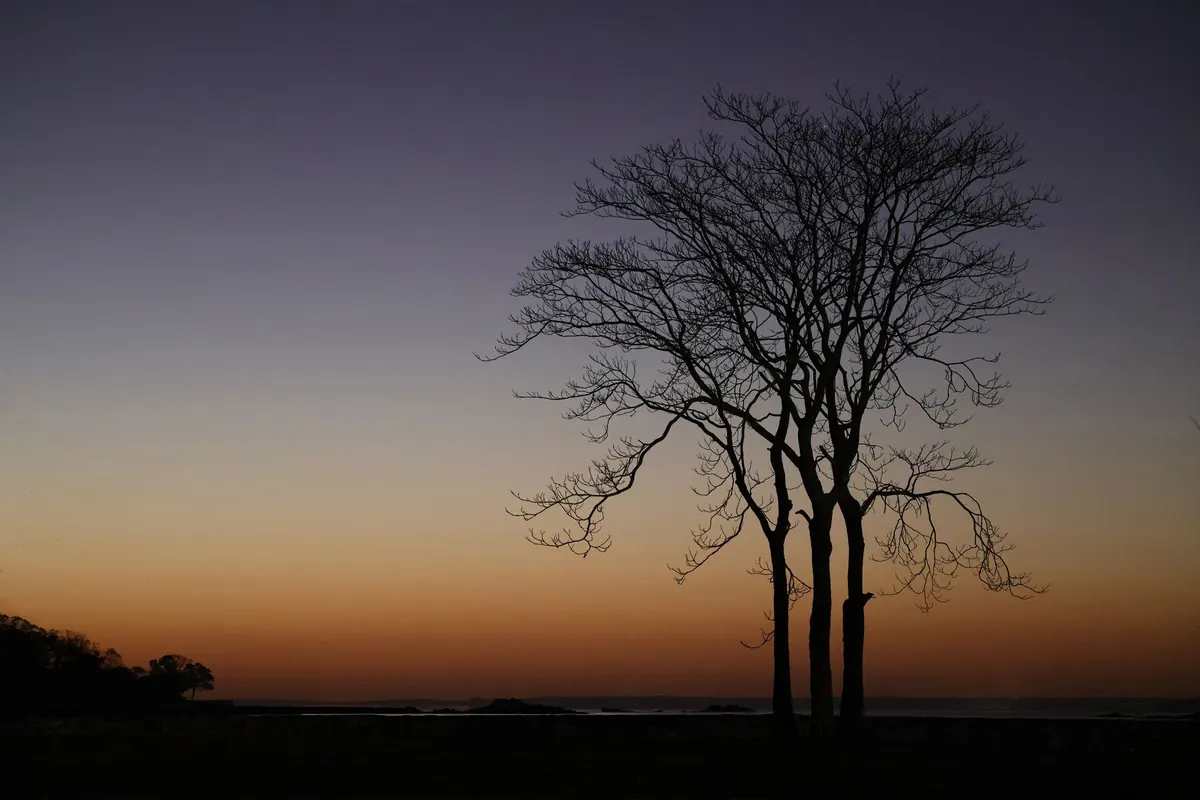
There is a window of maybe ten minutes when the world turns into a paper cut-out. The sun drops low, the sky fills with amber and rose, and everything in front of it — a fence post, a friend's shoulders, a stand of reeds — becomes a black shape against all that colour. Photographing it is less about expensive equipment than about knowing what to look for, where to stand, and how to read your camera's meter. This checklist covers those three things in the order you will actually need them.
A silhouette lives or dies on its outline. Detail disappears, so the only information left in your picture is the shape itself. Ask a simple question before you raise the camera: if this subject were entirely black, would a stranger still know what it is?
A lone oak on a ridge works. So does a cyclist on a flat road, a heron at the edge of a pond, a row of fence posts marching up a hill, or a child holding a kite string. A dense thicket of bushes usually fails, because twenty overlapping branches become one shapeless lump.
Train your eye by squinting until the scene dissolves into blobs. Good silhouettes tend to have clean edges, a little empty space around them, and one clear gesture — an arm raised, a branch bending, a sail leaning into the wind. If two objects touch and merge into the same dark mass, move your feet. One step sideways often separates a person from the tree behind them. That is almost always better than zooming.
Arrive at least forty-five minutes before sunset, while the light is still ordinary. Walk the spot. Note where the sun will meet the horizon, remembering that its position shifts through the year, so a summer sunset may sit far to the right of where you found it in December.
Pick two or three positions rather than one. A short stretch of shoreline might offer a jetty for a wide view, a gap in the reeds for a low angle, and a small rise where you can place a person against open sky. Standing in the right place matters more than any setting.
Think about the sun's placement too. With the sun behind your subject and slightly off to one side, you keep deep colour and get less flare washing across the frame. With the sun hidden just outside the frame, the sky becomes an even, glowing backdrop — often the cleanest look for people and animals. With the sun inside the frame, you get a bright disc and a starburst effect, but you also get flare to manage. Decide which of the three you want before the light goes.
Your camera's meter wants an average scene, and a sunset is anything but average. Point it at the whole frame and the bright sky drags the exposure down until the colour looks grey and dull. The fix is simple: decide the sky is the subject, then protect it.
Switch to spot metering if you have it and read a patch of bright sky a little above the horizon, away from the sun's core. Alternatively, take a reading with the camera tilted up at the sky, lock the exposure, then recompose. If the first frame still looks washed out, dial in a stop or a stop and a half of negative exposure compensation and check again.
Use the histogram, not your eyes in bright outdoor light. You want the brightest colours sitting close to the right edge without climbing the wall and clipping. Shoot RAW if your camera allows it; those last few minutes of sky often need a small recovery in editing, and RAW gives you the room.
And resist the urge to rescue detail in the silhouette. A little texture showing through the shadow means you have exposed too bright and the shape has gone muddy. Black is the point. Let it be black.
Sunset is a sequence, not a single instant. Here is how it usually unfolds, and what to do at each stage.
A tilting horizon. Check it every few frames, especially when you are crouching or working quickly on uneven ground.
Flare eating the colour. Use a lens hood, shield the front element with your hand just outside the frame, or shift a step so the sun grazes the edge instead of hitting the glass directly.
A subject that is too small. Silhouettes need scale. Get closer or fill more of the frame, and leave generous sky above the shape rather than centring it.
Too much review time. Glance at the histogram, then put the camera back to your eye. The colour will not wait while you scroll through the last twenty pictures.
A single good frame. When something works, keep going — a slight turn of a head, a bird taking off, a shift of half a metre. The second and third versions are usually the ones you keep.
Before you leave: charge the battery, clear the card, and check the sunset time rather than guessing. On arrival: walk the ground, choose two or three positions, and confirm roughly where the sun will land. Before the colour starts: set ISO low, aperture around f/8 to f/11, focus on the edge of your subject, and meter for the sky. During the final minutes: hold your position, work the shapes you found in daylight, and let the foreground go completely black.
Then lower the camera for a moment and watch the thing itself. The best photographs of a sunset tend to come from someone who was paying attention to it.
Photo: David Kanigan / Pexels
Previous Post
How to Create a Sunset-Inspired Garden Color Palette
Next Post
Seasonal Sunflower Calendar: When to Plant for Continuous Blooms